Thursday, January 19

velvet kiss...valentine matchbox tutorial


yesterday i dyed a new batch of crepe paper ruffles. love the nude pink and velvet kiss for valentines day.

last night just before going to bed i made this little lunch box valentine. such a sweet little surprise...

any little matchbox will do, i like these waterproof matches by coghlans as they are a bit deeper.

gather together your matchbox, some old book paper, ribbon, tinsel, a button, and some crepe paper ruffles.

here is the bundle in my shop i dyed with a velvet button, tinsel and pleated paper heart all ready to go.


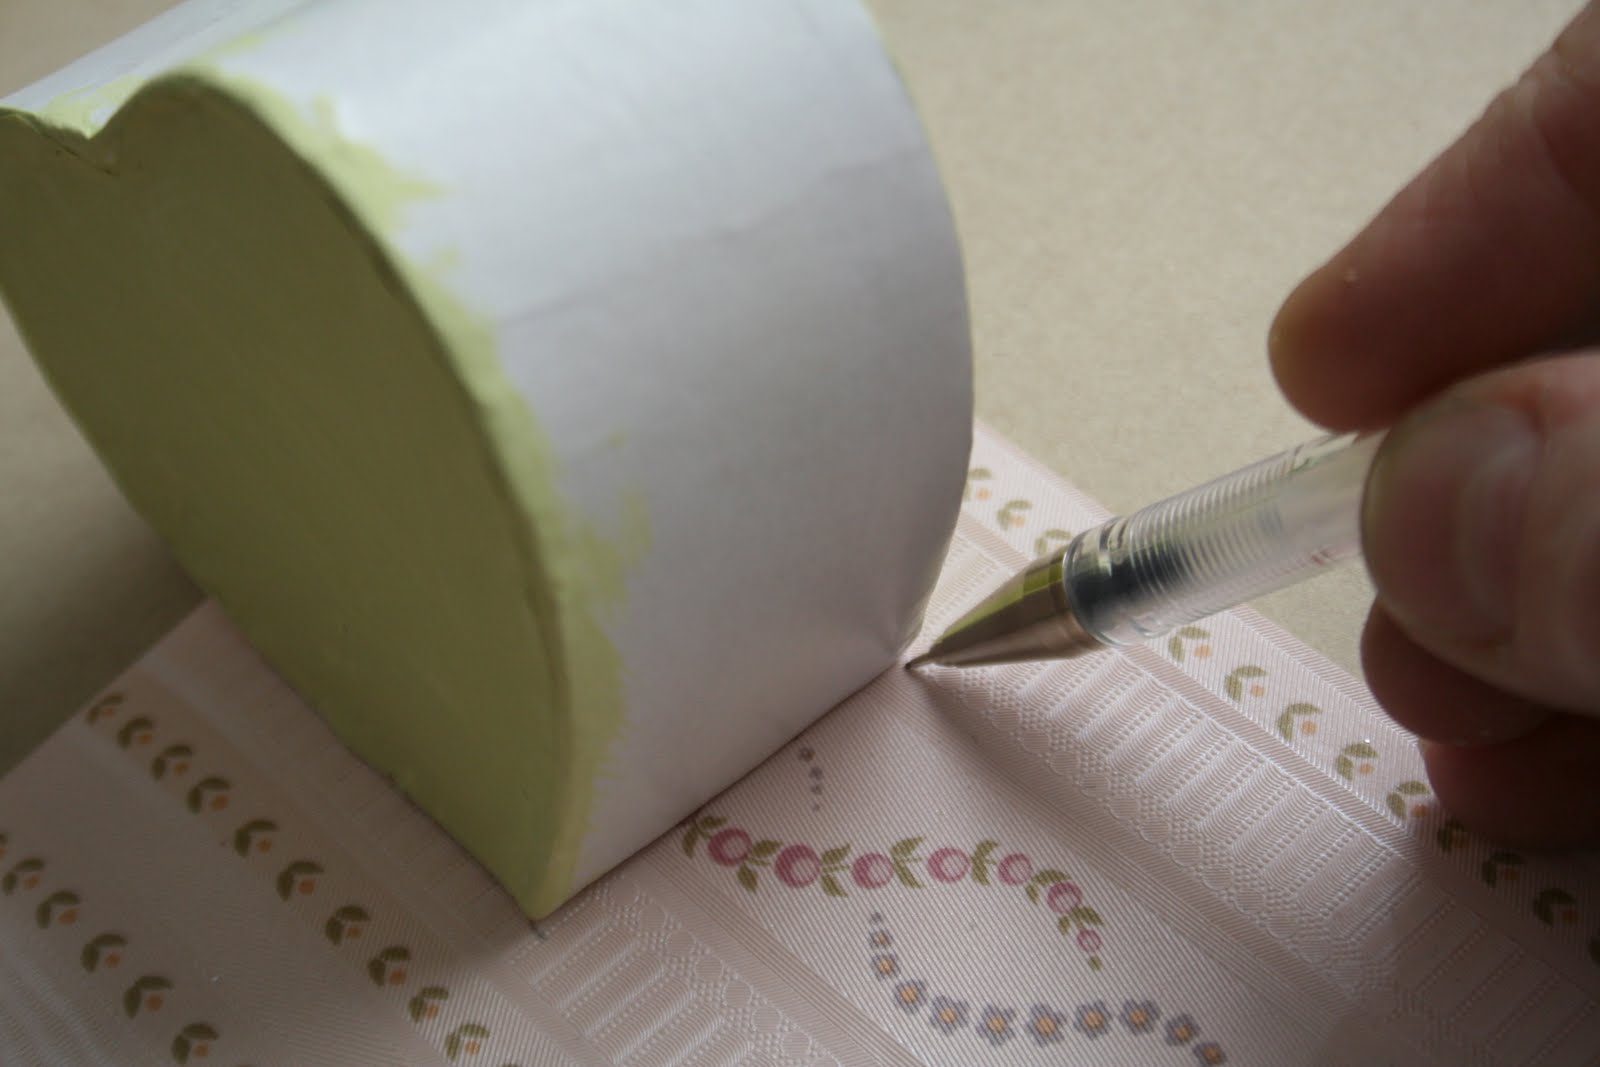
step 1. cover your box with the book paper, i just use a glue stick.

step 2. wrap the crepe paper ruffles around the box. i wrapped mine so there was a double ruffle layer on the top and a single layer on the bottom so it would sit flat.

step 3. tie the ribbon around the box to cover the stitching. thread on the button and tie the ribbon again to secure.

step 4. punch out 6 paper hearts and sew them down the middle. fold up each layer.

step 5. wrap the paper heart and tinsel around the button. viola!

now just tuck a sweet note and a tiny treat in your box and hide is somewhere fun like on a pillow or in a lunchbox.

oh and this is new today, a french valentine hot air balloon gift tag kit. so adore these beauties.
xo julie

Tuesday, January 17

diy valentine heart box tutorial


its a month until valentines day and time to get out all my pretty pink trims...
this little glittered heart box is so fun to make and would be such a darling gift for one of your sweethearts filled with chocolates.
this little kit is available in my etsy shop today! special sweet treat for my blogland friends, get 10% off your valentine order in my shop. enter 'sweettreats' at checkout thru friday 1/20.


you will need a heart shaped paper mache box, decorative paper, some tiny trims, tulle, ribbon, tinsel, acrylic paint, glitter fabric (or glitter) and some millinery flowers and stamens.


step 1. paint the inside of your box and lid and also the bottom of your box with acrylic paint. a soft pink, pale aqua, or spring green would be lovely. i am using plaid's apple barrel paint #202011 Light green leaf. let dry.

step 2. spread tacky glue over the top of the lid and press down on your glitter fabric. i found this great glittered fabric trim with wired edges, it is 4 inches wide. smooth the top down to the lid and let dry. (if you don't have a glitter fabric trim available, coat the glue with a fine glitter, martha stewart and hampton art both make a great kit with lovely colors~both available at JoAnns)


step 3. cut a decorative paper strip to go around the sides of the box. start at the point of the box so your seam is at the bottom. glue in place with tacky glue.
i am using a wonderful old french wallpaper with a moire pattern and little buds.
cut your strip with a ruler and exacto blade for a super straight cut.

step 4. with some tiny sharp pointed scissors cut around your heart lid to remove excess glitter fabric.


step 5. cut a decorative paper strip to go around the sides of the heart lid. glue in place. add a narrow silver trim around the lid. i like to add the glue to the trim and smooth the trim around the lid, pressing firmly in place as i go.

step 6. decorate the top of the box. here is the basic layout. i folded a pink sugared stamen in half and glued that in place first at either end. then i added a piece of tinsel on top of the stamens. i cut 2 pieces of tulle and tied them around the glittered stamen bundle. then i tied the pink silk ribbon to hold in place. tie a double bow and notch the ends of the ribbon. next glue on the ribbon posy to the middle and last glue the cream flowers in place. let dry overnight.


i found these adorable aqua blue pressed paper berry baskets and used them to tuck all the goodies in for a fun diy kit with everything included to make your own valentine box... all you need is glue, scissors, and paint!


the scalloped tag was perfect, just love the hot air balloon. a little sweetness.
happy crafting, julie

Sunday, December 18

little angel swap...


i had the most lovely email from margaret bloom at we bloom here. a while ago. she wanted to host an angel swap and had seen some of the angels that were inspired from the little angel pattern in my book. of course i was thrilled with the news and signed right up. here is the image from pretty little felts~


i didn't make the december 1st deadline and only just this weekend was able to sit down and make my little angels. i have enjoyed so much receiving the lovely angel creations from around the world. i am hoping the sweet artists in my group will forgive the late delivery. and i hope to plan a bit better next year....

i wanted to use this sweet vintage paper angel made in japan for my inspiration.


we started out using a wooden base, i liked these from darice that i bought at hobby lobby. you can also buy them online at the silver penny.


they are super easy and fun even for kids to make.
step 1. paint the head and body. when the paint is dry on the head add the features. if i mess up i just turn the doll around and paint another face. the
hair covers up my mistake :)
step 2. glue on gown using felt, fabric, wool, or batting i used this great vintage twinkle mat i found that was used as snow for the tiny paper houses.
step 3. decorate the gown using trim, beads, sequins, glitter, etc


step 4. add the hair. use paint to paint on the hair, glue on wool, or glitter
step 5. glue on pipe cleaner arms. these great vintage ones i found on etsy
step 6. add wings. use german paper scrap wings like the vintage angel i bought, pressed paper or silk leaves look gorgeous, or this year i used tiny ribbon bows.
step 7. add a halo. use metallic paper or pipe cleaners, punch out a paper disc, or use a large vintage sequin.
step 8. add something sweet to hold. a jingle bell, a wreath, a paper banner, some stamens, or even a candle. this one was made from a cut toothpick, painted and glued in a vintage glass garland bead.


these are the sweet angels that were mailed to me.
Anna from Australia made these wonderful wool angels nestled in a little wool nest.
beautiful silver stitching embroidered on their wings.... lovely!


Ronnie from Australia made this delicate and lovely paper angel cut out, just stunning!


and here is her crocheted angel chorus...


Margaret sent these glittered angels with the darling faces and sparkling halos...


and this adorable snow angel was made by Angie in Wisconsin~


so sweet! hope you are all having a lovely week baking, sewing, decorating, caroling, and loving your dear ones.
warm wishes for your holiday, julie

Friday, December 2

paper mache class with terri brush....


there were a few snowflakes falling this afternoon when i finally caught a minute to take some photos of the projects i made at my paper mache class with terri brush.
this little snowman necklace has a glass bottle filled with vintage pearls and mica snow. its so tiny the whole thing measures 1-1/2 inches tall!

i am still a beginner working with clay, it is such a fun change from fabric--i just love it! in fact i have been having so much fun i decided to sign up for terri's online holiday workshop that starts today!


here is the jolly santa box i made. he is holding a tiny bell next to the little pink bottle brush tree that started my whole tree dying extravaganza...
i didn't do a very good job gluing everything down before i soldered the box and now santas hat is shaking around inside... oops...
i like how the soldering finished off the edges though. it just doesn't come off for hat fixing :)


so i decided to leave the glass front off this snowman. he has a little bottlebrush wreath collar, a glittered snowflake hanging beside him, and a wee little bottlebrush tree all decorated from top to bottom to keep him company.
the little tree was a vintage earring i rescued. (that thing would have been scratchy!)


the outside of the box is decorated with crepe paper ruffles, vintage trim, and a little lacquered holly leaf sprig.


lorraine had a beautiful tree on her landing that was decorated with little plaster angels. i was so taken with them i created a couple of my own. dusted with mica they turned out so lovely. the next ones i make i am going to add little hangers to the top so i won't have to drill them.


the two of them are very different but i like them both.


here are some of the gals in my class and their pieces. cute em and her santa.


shannon with her lovely piece.


terri helping aimee with her box.


the gorgeous box olga made with her paper mache queen.


deb with her darling snowman.


these two images are by lorraines daughter in law. such cool faces.


and here is terri's snowman that was on the counter all decked out in glittered glass dome for inspiration. it was a wonderful 2 days at your workshop terri, thank you!

Related Posts Plugin for WordPress, Blogger...